SCRAPS
Level Design
SCRAPS is a third-person post apocalyptic game, and I was tasked with creating a level for it.
This project taught me a lot of fundamental concepts for level design, such as player feedback, pacing, and objectives.
Bubble Diagram and Level Layout Map
In this section, I will talk about the beginning stages that I went through while working on SCRAPS
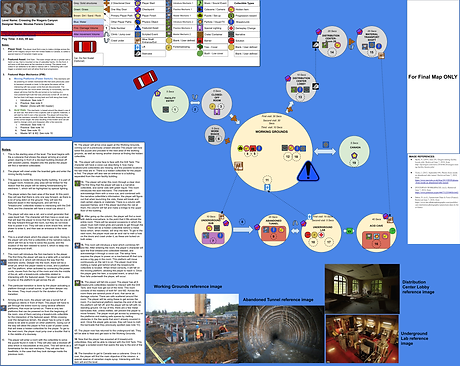
LEVEL DESIGN MAP
The first thing I worked on before working on my SCRAPS level, was a level design map.
This map was a basic layout of how the player will encounter the different interactive spots in the level, that included everything from doorways, pacing, expected player route, player feedback, and more.
It began as a bubble diagram, which focused primarily on the interactive setups that each space will have. These setups were meant to teach the player about a mechanic by the introduce/practice/master method.
The end product showed a lot more detail, including collectibles, structure and terrain layout, and more polished interactive setups that are meant to challenge the player progressively.
LEVEL LAYOUT MAP
This is the more polished version of the bubble map, which was implemented in unity by projecting it onto a terrain asset in unity. This allowed me to build the level around the map really easily

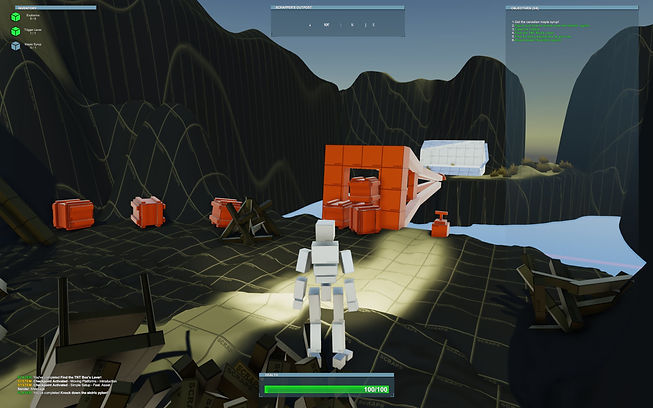
BLOCKOUT
With a level layout map, I was able to start working in-engine (This project was realized in Unity 3D).
The idea that I had for this level was of a abandonded mining facility, to fit the overall mood of the game. This meant it was going to have an overworld as well as an underground/basement section. This turned out to be a little complicated, but I managed to work it out by using two different terrain assets. Making the rest of the blockout, however, was a breeze, since the structures in my level were really basic buildings and rooms.
Objects that were interactable were Color Coded with orange, and Objects that weren't were a shade of gray. This was done to give some clarity as to which asset does what in the Blockout.
Overview


Platform Mechanic - Practice Setup
Acid Mechanic - Practice Setup


Final Interactive Setup before interaction
After interaction
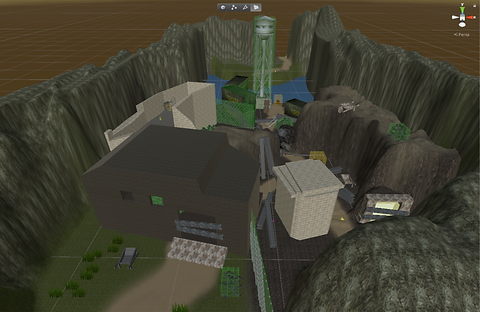
Polish
Now that the Blockout was completed, it was time for final polish.
This stage consisted of Playtesting and addressing Feedback, as well as texturing and any additional details for the Level.
Overview
Visual Overhaul
Every asset was applied a texture or material. Additional assets for setting were also added, such as the water tower or containers.

Gameplay
Playtesting and Addressing feedback
Rigorous Playtesting was done to ensure that the player could not go Out of Bounds, any information that the player required was given clearly, feel of the Level was correct, and any additional Bugs/soft-lock instances were addressed and removed.